Written by Pat Hanrahan and Julie Zelenski
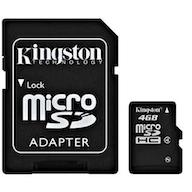
Your parts kit contains a microSDHC card. A secure digital (SD) card
stores data in non-volatile memory. The HC in SDHC stands for high
capacity. A micro-SD is shown here with its adapter "jacket" . The Raspberry Pi card reader slot accepts an un-jacketed micro-SD card. When the Pi reset, it looks for a program file named kernel.img on its micro-SD card. To change the program executed after reset, you change that file.
The process of loading a program onto the SD card looks like this:
- Prepare the card with the proper files:
- Mount the card on your laptop and copy the necessary files onto it.
- Eject the card from your laptop.
- Use card on Raspberry Pi:
- Insert card into P's card slot.
- Reset Pi.
- After reset, the Pi reads the program to run from the card.
To change the program, repeat the process to copy an updated version of the files onto the card.
In the long run, it is much more convenient to prep the card with a bootloader and then send an updated program to the Pi over a serial connection.
Mount SD card on laptop
To edit the files on the card, mount it on your laptop. If your laptop does not have a built-in SD card reader slot, you will need an external USB reader. If your card reader accepts a full-size card, use a jacket adapter around the micro card.
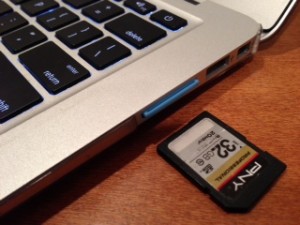
When you insert a card into the reader, the volume mounts automatically. The new volume will show up in the macOS Finder or Windows File Explorer along with other mounted file systems.
Copy files onto card
The necessary files are stored in the $CS107E/firmware directory . There are 4 files.
$ cd $CS107E/firmware
$ ls
blink-actled.bin   bootcode.bin     bootloader.bin  start.elf
bootcode.bin and start.elf are the start files necessary for the first and second stages for GPU boot. The Pi boot sequence next looks for a file called kernel.img, the program to run. Normally kernel.img is the linux kernel. In this course, we will replace the linux kernel with our own program.
Our firmware folder has two program files, blink-actled.bin and
bootloader.bin. The program blink-actled.bin
blinks the on-board activity (ACT) LED. Copying blink-actled.bin
to kernel.img on the sd card is a good way to test whether your Pi is working
After you've verified the blink program, use bootloader.bin as the kernel.img on the card so that Pi will start the bootloader that can receive uploaded programs.
You can copy the files using cp in a shell or via the macOS Finder or Windows File Explorer. After copying the firmware files onto your SD card, safely eject it.
Insert card into Raspberry Pi
Insert the card into the slot on the underside of the Raspberry Pi circuit board labeled "Micro SD Card". There is a small spring that holds the card in place. As you push the card in, you will feel the mechanism grab onto the card and secure it.
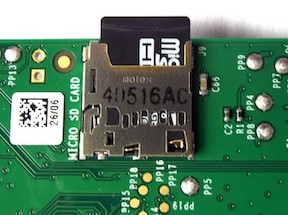
When you reset the Pi, it will read the file kernel.img from the card and run that program.
Removing the card from the Pi
To eject the card from the Pi's card slot, push the card in and allow it to spring back out.
Do not force the mechanism! Do not pull the card, instead gently push the card in and allow it to spring back out. If you forcibly pull the card out, you can break the mechanism and potentially destroy your Pi.
Troubleshooting
If the files on the SD card are missing, incorrectly named or corrupted, the Pi will fail to reset. You can watch the Pi's on-board leds after a reset for clues about progress.
- When the Pi resets and is receiving power, the red PWR led should turn on and stay lit.
- If the green ACT led turns on and stays lit, this indicates the Pi failed in first-stage boot. Check that SD card is fully inserted and the card contains the proper file
bootcode.bin - If the green ACT led does four fast flashes, long pause and repeats, the Pi failed in second-stage boot. Check that the card contains the proper file
start.elf - If the green ACT led does eight fast flashes, long pause and repeats, the Pi failed to run the
kernel.imgprogram. Check that the card contains the proper filekernel.img - If the green ACT led does two flashes, short pause and repeats, ("heartbeat pattern"), this means reset was successful and the bootloader is now running.
If you ever need to fix the contents of a corrupted SD card, copy the known good versions of the firmware files from the directory $CS107e/firmware .