Written by Philip Levis, updated by Julie Zelenski
Due: Tuesday, February 28 at 5:00 pm
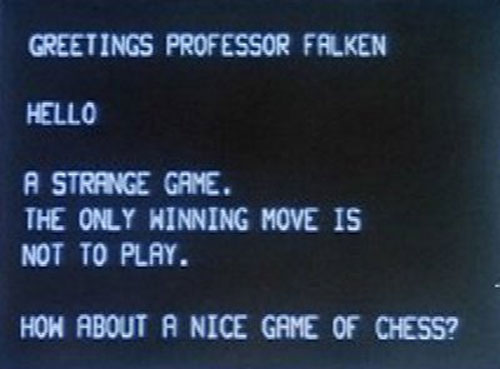
A console provides a command-line text interface for entering commands and seeing output. Today we have fancy shell programs that support scripts, process control, and output redirection. But simpler consoles can be powerful too. One very famous console is Joshua in WarGames.
Goals
In this assignment, you will add graphics capability to your Pi and use it to create a snazzy graphical display for your shell. This will unleash your Raspberry Pi from the shackles of its laptop minder and elevate it into a standalone personal computer running a console that allows the user to enter and execute commands. Neat!
In completing this assignment you will have:
- learned how a framebuffer is used as a bitmap to drive a video display
- implemented simple drawing routines
- gain greater proficiency with C pointers and multi-dimensioned arrays
After finishing this assignment, your system is complete and working. All that remains for assignment 7 is to add a little usability polish so you can type faster without dropping keystrokes. This system is all bare-metal code you wrote yourself – what a great achievement and sense of satisfaction you have earned with all your hard work!
Get starter files
Do a git pull in your $CS107E repository to ensure the courseware files are up to date.
$ cd $CS107E
$ git pull
Now cd to your local mycode repo and pull in the assignment starter code:
$ cd ~/cs107e_home/mycode
$ git checkout dev
$ git pull --allow-unrelated-histories starter-code assign6-starter
In the assign6 directory, you will find these files:
-
fb.c,gl.c,console.c: library modules -
test_gl_console.c: test program with your unit tests -
console_shell.c: application program that runs your shell, reading input from the PS/2 keyboard and displaying output to the console. You will use this program unchanged. -
Makefile: rules to build console_shell application (make run) and unit test program (make test) -
README.md: edit this text file to communicate with us about your submission
The make run target builds and runs the sample application
console_shell.bin. Use this target as a final step to confirm the full
integration of your fb, gl, and console modules. The make test target
builds and run the test program test_gl_console.bin. This test program
is where you will add all of your unit tests. You will make heavy use of this
target throughout your development.
You can edit the MY_MODULE_SOURCES list in the Makefile to choose which
of your modules to build on. (See instructions for use of
MY_MODULE_SOURCES in assignment 3) Building on all
your past modules now is a great way to get a preview of your progress toward
achieving the full system bonus.
Core functionality
1) Framebuffer
The base layer of graphics support is implemented in the fb module which
manages the framebuffer and communicates with the GPU.
Start by reviewing the header file fb.h (available in $CS107E/include or browse here).
void fb_init(unsigned int width, unsigned int height, unsigned int depth_in_bytes, fb_mode_t mode)void* fb_get_draw_buffer(void)void fb_swap_buffer(void)- simple getters for fb settings:
fb_get_width,fb_get_height, …
The primary job of the fb module is to configure and manage the
framebuffer. It operates by exchanging messages with the GPU using its mailbox.
You explored the mailbox operation in lab6, the source code for the mailbox module
can be reviewed in $CS107E/src/mailbox.c or browse here.
The starter version of fb_init contains the code from lab6 to configure the
framebuffer in single-buffered mode. In this mode, there is only one buffer.
All drawing takes place in that one buffer and is immediately displayed on
screen. The framebuffer's virtual size is configured to be equal to the
physical size.
You will extend fb_init to support configuring the framebuffer in
double-buffered mode. In this mode, the virtual height is set to be twice the
physical height; this makes space for two screen-size buffers in the one
virtual framebuffer. The lower half corresponds to one buffer and the upper
half is the other. One of the buffers will be the one currently displayed
on-screen; the other buffer that is currently off-screen will be used as the
'draw' buffer. In double-buffered mode, all drawing is done to the draw buffer
and when ready, swapping the two buffers gives a smooth on-screen transition.
To implement fb_swap_buffer you change which half of the virtual framebuffer
is on-screen by changing the Y offset from 0 to the physical height (or vice
versa). To make this change, set the y_offset in the fb struct and use
mailbox_request to inform the GPU of the change.
Time to test! The test_gl_console.c test program provides a simple test_fb.
Our sample test starts by configuring the framebuffer and using a
few asserts to confirm the initial state. To test drawing, the test writes
to the framebuffer. There is no assert-based test to confirm what is
drawn to the display, you have to do your own visual inspection. Read over the
provided test code and work out what should be displayed if working correctly.
Then run the test program and confirm what is drawn to the display matches
the expected. Now consider what further testing of your own you should add to
fully vet the fb module. These foundational operations are absolutely critical,
you want to be sure your implementation is rock-solid before moving on to the gl layer.
2) Graphics primitives
The graphics library layers on the framebuffer and provides higher-level drawing primitives to set and get the color of a pixel, draw filled rectangles, and display text.
Start by reviewing the header file gl.h (available in $CS107E/include or
browse here) to see the documentation of the basic drawing
functions:
void gl_init(unsigned int width, unsigned int height, gl_mode_t mode)void gl_draw_pixel(int x, int y, color_t c)color_t gl_read_pixel(int x, int y)void gl_draw_rect(int x, int y, int w, int h, color_t c)void gl_clear(color_t c)color_t gl_color(unsigned char r, unsigned char g, unsigned char b)- simple getters for gl settings:
gl_get_width,gl_get_height, …
Review the provided gl_init code to initialize the framebuffer for 32-bit
depth. Each pixel stores a 4-byte BGRA color.
Start by writing the simple getter functions that wrap the underlying
fbfunctions to provide a consistent gl interface for the client. The
graphics routines call into fb, but the client doesn't need to know this. The
client calls gl_init and gl_draw_..., without any direct use of fb.
Review the syntax for multi-dimensioned arrays in the framebuffer lecture and the exercises of Lab 6. Take care to compute the location of a pixel's data in the framebuffer based on pitch, not width. The pitch takes into the account the case where the GPU has made each row a little wider than requested for reasons of alignment.
When accessing the pixel data, be mindful that C does no
bounds-checking on array indexes. If you write to an index outside the bounds
of the framebuffer, you step on other memory in active use by the GPU, with
various dire consequences to follow. It is imperative that you take care to
access only valid pixel locations! The public gl_draw_pixel
should discard an attempt to write to location that is outside the framebuffer bounds.
Your other
functions such as gl_draw_rect and gl_draw_char must clip drawing to the framebuffer bounds.
One way to enforce clipping is iterate over all pixels you would like to
draw and call gl_draw_pixel for each, letting that function sort out which can be drawn. This simple
approach is easy to get correct, but can be slow because of the
repeated checks. The faster alternative is to first compute the clipped bounds (i.e. intersect requested rectangle with framebuffer bounds) and then only draw those pixels that are now known to be in bounds.
Time to test! The test_gl_console.c test program defines a
simple test_gl to get you started. The provided tests cases are very
rudimentary, you will need to supplement with many additional test cases of
your to confirm the full range of functionality. One possibility is to rig up
assert-based unit tests that make a draw_xxx call followed by calls to
read_pixel to confirm the pixel color at a location. Such tests confirm
a consistent round-trip between draw and read , however you must also
visually confirm the result that is drawn on the display – that's the real deal!
Be sure to include test cases that confirm the correct clipping behavior!
Use your gl module to draw something that makes you happy: SMPTE color
bars, the Mandelbrot
set, Sierpinski's
carpet, crazy
psychedelic patterns, …
A note on performance Thus far you have likely not given much thought to performance tuning as your programs have run acceptably fast without special effort. Now that you are writing graphics code, there can be speed bumps that cry out for attention. The bottlenecks will typically show up in the inner loops. With so many pixels to process (e.g., 2 million in a 1920 x 1080 display), streamlining the work per pixel has a big impact. For example, a
gl_clearthat executed 30 instructions per pixel would keep the Pi occupied for a full 3 seconds. Squeezing out 10 instructions of the loop body would cut 20 million instructions overall and save a full second – big bang for the buck!For this assignment, we continue to prioritize correct functionality over efficiency, so it's fine to go with a simple-and-slow approach for now. We expect that your drawing will be sluggish and your console will miss keys that are typed while it is in the middle of drawing. You'll fix this up in assignment 7 by employing a mechanism for sharing the CPU during a long-running operation.
3) Fonts and text-drawing
The final two functions to implement for the graphics library are:
void gl_draw_char(int x, int y, char ch, color_t c)void gl_draw_string(int x, int y, const char* str, color_t c)
The last exercise of lab 6 introduced you to the provided font
module that manages the font image data. A font has one combined bitmap
consisting of glyphs for all characters, from which it can extract individual
character images.
gl_draw_char will use font_get_glyph to obtain the glyph image and then
draws each 'on' pixel.
gl_draw_string is simply a loop that calls gl_draw_char for each character,
left to right in a single line.
Just as you did previously, ensure that you clip all text drawing to the bounds of the framebuffer.
Edit the test program to draw yourself a congratulatory message and add a variety of tests that exercise text drawing. Visual inspection is probably your best option for test cases for drawing text. Be sure to have test cases that confirm that drawn characters are correctly clipped to the display bounds.
You're now ready to tackle the console!
4) Console
The console module uses the text-drawing functions of the graphics library to draw the console contents (i.e. rows of text) on the display.
Review the header file console.h (available in $CS107E/include or browse
here). The console has these public functions:
void console_init(unsigned int nrows, unsigned int ncols, color_t foreground, color_t background)void console_clear(void)int console_printf(const char *format, ...)
console_init initializes the contents to empty, console_printf adds text
at the cursor position, and console_clear resets the contents to empty.
The console module is a layer on top of the graphics library, which itself is a
layer on top of the framebuffer. The client interfaces with console by
calling console_init and then console_printf, without any direct use of
gl or fb.
The console_printf function should call use your vsnprintf to prepare the
formatted output. Once prepared, process the characters in the formatted output
one-by-one. Each ordinary character is inserted at the cursor position and the
cursor advances. There are three special characters that require unique
processing:
-
\b: backspace (move cursor backwards one position) -
\n: newline (move cursor down to first column of next row) -
\f: form feed (clear contents and move cursor to home position in upper left)
As the console makes changes to the text contents, it updates the display to match, using the gl functions to draw the text. Your console must use double-buffering and will redraw the entire screen on each update, then swap the update contents onto the screen in one go.
The console should also handle the operations for:
- Horizontal wrapping: if there are too many characters to fit on the current row, automatically wrap the overflow to the next row. It is a nice touch for backspace to work correctly on a wrapped row, but we won't test this specific case in grading.
- Vertical scrolling: filling the bottommost row and starting a new one scrolls the text upwards, that is, all rows are shifted up by one. The top row scrolls off and the bottommost row now contains the text just added.
We provide a very basic console test in test_gl_console.c to get you started.
You will need to add new test cases for scrolling, line wrap, and form feed in
isolation, as well as the conjunction of these special features. There is a lot
to test! Although the intention is for console to eventually be the output
device for the shell, we recommend putting off that final integration test to
the very end. Plan to do all of your console development and testing in
isolation using console_printf and unit tests in test_gl_console.c. Trying
to debug console from within the context of the full shell program
adds complication that is not recommended.
Designing your console
The external interface of the console must match the specification as given in console.h
but the internal design of module implementation is left to you as a creative and open-ended task.
You know that the console must manage the text contents and track the cursor position,
but exactly how you structure that data is your choice.
For example, you might choose to store the contents as a 1-D array of char * or
instead as a 2-D array of char or something else entirely.
When thinking aobut these choices, be sure to consider the implications
in terms of the code require to manage it. Some ways of structuring the data
can simplify the implementation tasks or have less opportunity for error.
Make choices that make your life easier!
Don't feel bound to your first idea: if you start implementing your approach and run into tough sledding and messy special cases, you may want to consider a new design. Like much code in this class, 80% of the effort is first figuring out what the code should do. Once you have worked that out, finishing the code can be straighforward. Throwing away that first attempt and using what you learned from it to restart with a clean design is often the best path forward; far better than grinding along with a flawed approach.
When ready to implement, take it one small step at a time. The code for the console is structurally complex and many tricky interactions to manage (printing text, moving down the screen, scrolling, backspace). Your best bet is to decompose into small parts that you can incrementally write, test, then build on. For example, you can start by handling only a single line, then backspace, then multiple rows, then scrolling. Think through each part before you start coding it: ten minutes of design and sketching pseudocode on paper can save you hours of debugging.
5) Shell + console = magic!
The final step is an easy but very satisfying conclusion: use your console as
the output display for your shell. The make run target builds the
application program console_shell.c. This program calls your shell_init
passing console_printf in place of the uart printf. Simply by changing
which function pointer is supplied, the shell you wrote in assignment 5 now
springs to life in graphical form! You don't need to write any new code for
this, just run the console_shell program and enjoy seeing your modules all
work together in harmony.
If the console shell feels slow or drops keys as you're typing, don't worry. We'll fix that problem in the next assignment. Why might the console shell be slow to process keys?
The video below demonstrates of our reference console. The shell is running on the Pi, user is typing on the PS/2 keyboard, and the output is displaying on the HDMI monitor.
Testing and debugging
The fb and gl modules can be exercised by use of assert with
gl_read_pixel can be used to confirm that expected color at a given pixel
location. You can also run the test program and observe what is displayed to
the monitor and visually confirm correctness.
For console, much of the testing can be done by unit tests that call
console_printf. Start with simple outputs and work your way up to correct
handling of special characters, wrapping, and scrolling. After confirming
success with a full battery of unit tests, switch to the console_shell
program as a final interactive test to see that console_printf also works
correctly in the context of the graphical shell. You will need to type slowly
on your PS/2 keyboard to avoid missed keys.
Careful with memory! The primary source of debugging woes on this assignment are due to incorrect access to memory – uninitialized pointers, indexes out of bounds, wrong level of indirection, incorrect typecast, misunderstanding about units or layout – there be dragons here! Know the bounds on your arrays and always respect those bounds. Be conscious of the automatic scaling applied for pointer arithmetic/array access. Keep track of the units a value is expressed in (bits? bytes? pixels?). Be especially vigilant when accessing the framebuffer memory. The neighboring memory to the framebuffer contains data critical to the GPU and should you erroneously write outside the framebuffer bounds, the transgression is can be deadly (garbage drawn to the display, a surprise redisplay of the Pi test pattern, a GPU crash/lockup that forces you to reset your Pi). Such crazy effects are a sign you have bugs in how you access the framebuffer memory.
Extension: Line and triangle drawing
Extend the graphics library to support drawing anti-aliased lines and
triangles by implementing the functions gl_draw_line and gl_draw_triangle.
Your line drawing function should draw anti-aliased lines:
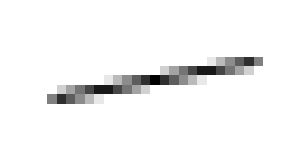
Drawing a triangle starts with drawing anti-aliased lines for the triangle outline and filling the interior with the specified color.
This extension is true extra credit and requires you to learn about line drawing algorithms and brush up on your math/geometry. A good introduction is the Wikipedia entry on line drawing and "Computer Graphics from Scratch" has a nice explanation of triangle wireframes.
When using external resources, be mindful that pasting-and-modifying code you find online does not earn extension credit and misrepresenting the work of others as your own is a violation of the Honor Code. While you are welcome to read conceptual information and skim pseudocode to learn about an existing algorithm, when ready to implement, you must put aside all references and write and debug the code yourself based on your own authentic understanding.
Tag with assign6-extension to submit the extension for grading. Include the following information in your assign6 README.md:
- cite all references and resources that you used to learn from
- what approach did you use for line-drawing? why did you choose that approach? describe how the algorithm operates.
- what approach did you use for triangle-drawing? why did you choose that approach? describe how the algorithm operates.
Submit
The deliverables for assign6-submit are:
- Implementation of the
fb.c,gl.candconsole.clibrary modules - Your comprehensive tests in
tests_gl_console.c -
README.md(possibly empty)
Submit your finished code by commit, tag assign6-submit, push to remote, and ensure you have an open pull request. The steps to follow are given in the git workflow guide.
Grading
To grade this assignment, we will:
- Verify that your submission builds correctly, with no warnings. Warnings and/or build errors result in automatic deductions. Clean build always!
- Run automated tests that exercise the functionality of your
fb,glandconsolemodules. - Go over the tests you added to
test_gl_console.cand evaluate them for thoughtfulness and completeness in coverage. - Review your code and provide feedback on your design and style choices.
Our highest priority tests will focus on the core features for this assignment:
- Essential functionality of your library modules
-
fb- correct configuration of framebuffer
- double buffering
-
gl- drawing pixels, rects, characters
- correct clipping of all drawing
-
console- display ordinary characters
- handling of special chars (\n \b \f)
- will not test: tab or backspace through tab
- horizontal line wrap
- will not test: backspace through wrapped line
- vertical scrolling
-
The additional tests of lower priority will examine less critical features, edge cases, and robustness. Make sure you thoroughly tested for a variety of scenarios!